Sunday, August 31, 2008

This is....My Favourite Fabric/Craft Shop

Immediately GJ's Discount Fabrics in Lygon St (corner of Stewart St) springs to mind - especially the back room. There be treasures there... like fabulous remnants of stretch pvc in mock osterich, repro cotton bark cloth, loads of knits and suiting, discounted quilting fabrics and loads of surprises. The patchwork fabric range (rather aptly UPSTAIRS!!) is absolute heaven, and the women who work there are ... well... angels!


Kimono House springs to mind a mili-second after GJ's. Another treasure-trove, run by another angel. Leanne is passionate about beautiful, beautiful Japanese textiles and has created a little slice of fabric heaven in the heart of the city. It's also in the Nicholas Building, which is one of my favourite places in the world.


Online I'm a big fan of Z&S Fabrics. When I need a bit of me-time I take my time to go through the clearance fabrics to find gems, then go through each of the designer ranges until I have a 6-yard bundle or two (I'm currently awaiting three bundles....).


This is the "currently being used" stash on my cutting table. Kimono House Poppy print on top of Z&S quilting fabrics stacked on top of GJ's cotton jersey.... It appears I'm going through a "pink and green" phase.... Thanks to Sharon for a fab theme, and for putting me on to Quilt Home in her post today.... (I thought I'd check it out and caught myself filling up a shopping cart. Thought I'd better do this blog post before I got too carried away with more fabric shopping! I'll get back to it in a minute...)

Thanks to Angela for This Is.

Saturday, August 30, 2008

Purse Frames and Workshops

Lots happening on the purse frame front at the moment. Lots of yet-to-be-revealed excitement in the making.... and some news we're ready to tell.

In Sydney last week we tested the water with a few kits using Lara's beautiful Kirin & Co fabric. They'll be on the website soon - wholesale and retail enquiries are welcome in the meantime.

We've also scheduled a few purse frame workshops to reduce the waiting list for them, but the dates don't necessarily suit everyone ON the waiting list. If you're interested in doing this workshop on 20th September or 18th October, let us know - THERE ARE STILL PLACES AVAILABLE!!! You can contact Leah or send in a booking form.

Thursday, August 28, 2008

Oh, and I forgot to mention....

Living Creatively very nicely did a review on my Bag Ladies Brunch ages ago, and I forgot to draw everyone's attention to it. Very remiss of me not to acknowledge them, as they've been super-duper supportive and lovely. Very big thanks to Angela and her gorgeous team once again!

I'm also in the business section this month, spouting words of wisdom (?) about what I'd recommend to aspiring creatives wanting to start a crafty business. (Nothing terribly original as far as business stuff goes - just the important bits that we often don't think about when we want to make a LIVING from making fabulous things).

You can also download the tutorial for these cute little paper bag decorations here. (I reckon they'd be cute little sweetie bags at a party). There are lots of other fab tutorials as well!!

Wednesday, August 27, 2008

Did someone mention TUTORIALS a while ago...?

Oh... that'd be ME.

I'm SO SORRY that life got in the way of my good intentions to spend August writing tutorials for y'all.... This bag was one of the super-stars on my table in Sydney on the weekend (on the FLOOR under my table, actually), and the attention it recieved reminded me that I was going to post a quick HOW TO about it.

It's a variation on my Wrap pattern, but you can also do the same thing with the Small Wrap and the Sling (and any other bag with all-in-one straps and facing). I'm afraid you'll need the bag pattern instuctions to get the most out of this one. The photos were taken AFTER the bag was made up, so you'll need to have a bit of an understanding of the pattern to follow these instructions.

1. Before you cut out your bag pieces, play around with some large o-rings and your pattern, and decide how much strap you'll need to fold over the rings. (Even better if you have a FABRIC version of the bag made up already!). You need to leave enough strap to fold through the ring and anchor back to the inside of the bag - at a depth that gives the strap room to gather and fall. It's a visual thing.... you'll get it when you see it.... I hope. (I forgot to take a photo of that bit, sorry!).

2. Fold the paper pattern pieces (for both the outside of the bag and the facing) to shorten the straps to the desired length. Cut out your fabric pieces.

3. Make up the bag body. Attach the facing all the way around the top of the bag (including across the top of the cut-off straps). Turn it through to the right side and backstitch/understitch/topstitch in the usual way (follow the instructions in the pattern!).

4. Fold the strap over the o-rings and pin it to the facing. (I've used two Extra-Large O-rings on each side of the strap here). Topstitch to attach the edge of the strap to the facing (not through to the outside fabric).

5. Pin the topstitched edge of the strap (and the facing) to the outside of the bag. Double-check that the fabric is falling nicely into gathers from the rings (not bunching up). Adjust the pins if necessary.6. Think of a clever way to anchor the facing and strap to the outside of the bag (to stop the facing from being pulled up out of the bag). I've used grommets, but you could use buttons, simple embroidery stitches (cross-stitch or running stitch).... safety pins...? Whatever works for you.
7. Make a new shoulder strap and attach it to the top of the rings (if you don't know how to do that I suggest you come to a class or try one of my Beginners patterns).

It looks like a completely different bag.... and I only wish I'd thought of this variation when I was writing the instructions for this pattern!
Oh - and a lot of people ask me about grommets. I don't sell them because the hole punch and setting tool cost about $100 (I can't get them any cheaper). If you want to do lots of grommets (like I do) then it's worth getting the tools. You'll need to check out your local saddlery supplier for them. If you come to one of my classes I'll let you use mine!!

On My Desk.... Wednesday

I'm overwhelmed by the kindness of strangers... This amazing parcel arrived from Meri, all the way from Portugal. It had a huge piece of the most beautiful quality Portugese linen, a little (real) slate board with slate pencil and chalk, and this FABULOUS drawing by one of her grandchildren.I was stunned by the generosity.

What did I do to deserve such overwhelming goodness....? Well the truth is I don't deserve it!! I just sent Meri a little packet of plastic needles for her grandchildren to embroider with. (She blogged the results here... gorgeous stuff!!).

Meri does the most fantastic embroidery and is passing on the gift to her grandkids.... well worth supporting, I thought. It was very easy to pop down to Spotlight and pick up a little packet of needles and I certainly don't deserve such treasures in return.

THANK YOU, Meri (sorry I can't do the proper "e" in your name on this keyboard). You're a WONDERFUL, kind (and very talented) person. It's people like you that make the world a better place. My little artist got to work straight away on the slate. She drew the face and then said, "That's Mummy......I'll WRITE 'Mummy'... that's the M...." (draws three lines and puts a line over the top, and then does a few more lines...) "That's the Y...." (then does spirally letter at the front of the M) "...and that's the E!" .

Ok, I never said she could SPELL!!!

Three cheers and a big hug for Meri.

...and a few more cheers for Kirsty, for hosting On My Desk.

Tuesday, August 26, 2008

Home again, home again...

Had a fab time at Stitches and Craft in Sydney, in the wonderful Living Creatively garden...
I'm REALLY looking forward to seeing their gorgeous style overhaul the Stitches and Craft Show next year. They've just taken ownership of the show, and I think that is a FANTASTIC thing for contemporary crafters, who (until Living Creatively came along) were somewhat overlooked by Stitches and Craft in favour of traditional crafts.
This is my little "picnic table" (which was a little crowded, because I ...ummm... brought too much stuff).
It was lovely to be right near Justine with the small but mighty MixTape.
Also fab to see the adorable Audrey and Maude softies and catch up again with the adorable Cathy and Louise. I bought the patterns for Poppy and her Puppies and Robot Boy and Robot Girl to make up with my wee girl.
And Fi's table was BURSTING with gorgeous colour and loveliness. Unfortunately I didn't get a chance to photograph it in it's full glory. These pics were snapped before we'd set up properly.
Great to also meet Claire and her fantastically detailed and individual softies. The colours on her table were so sweet I wanted to eat them (...had I not scoffed record-breaking amounts of chocolate over the three days I was there).
Kristen kept me alive with chocolate, good humour and the delightful cuteness of these little bunnies. I'm lovin' that birdy-twiggy print panel of hers. I meant to buy one but was distracted once people started coming in the door... must amend that oversight in the near future.
Also great to meet Belinda (somehow I didn't get a pic, but you can see her beautiful table here). I was thrilled to meet lots of loyal customers, fellow bloggers and LOADS of new people, and I talked NON-STOP!!!

The winner of the $50 voucher I had as a prize draw at the show is Margi Sisson. She tells me she "never wins anything" and had had an upsetting start to the day, so I'm glad it sparkled up the day a bit for her today. Thanks to all who participated.

I'm all talked out, utterly exhausted and surviving only on high doses of dark chocolate. I haven't managed a day off to recouperate and have yet to get around to lurking, commenting or responding on other blogs... I think I'm going to have an early one tonight and steal a few hours out of tomorrow to take the small one swimming. A bit of a slow day is in order, methinks.

Thursday, August 21, 2008

..and it only took me NINE HOURS!!!

I'm packed and ready for that taxi to the airport in the morning!! I packed, re-packed, weighed and re-packed, and I now have three 20kg bags (luggage capacity for the whole family!!). That's just the patterns and sample bags. Our personal stuff will be in hand-luggage! I have NO IDEA how we're going to manage this load once we leave the airport and those handy little airport trolleys. There are only two of us who are big enough to carry more than a teddy-bear. Ho hum.... we'll work it out (she laughs nervously).

I had to do a bit of impromtu bag-making at the very last minute this afternoon. The nasty (and very cheap) big square bag I'd spent all day packing broke a strap when I tried to lift it. A piece of cotton drill, a couple of long zips, a length of webbing and a bias tape maker were quickly put to work in one of those "wrap it around and sew it" kind of bags (no measuring, no pattern.... lots of bribing my little assistant with treats if she let me finish my sewing!!!). It came together beautifully and I just popped the broken bag inside it!!!

All going well, I'll be on the third floor with Living Creatively at the Stitches and Craft Show from 1pm tomorrow, and then all day Saturday and Sunday. I'm looking forward to catching up with Cathy and Louise there tomorrow, and then Fi and Justine will be there on the weekend. Gosh, it'll feel just like home... or at least like the Melbourne S&C show in March!!!

Wednesday, August 20, 2008

On my desk...

Ummmmm.... and floor... and generally all over the studio. Getting ready for the Stitches and Craft Show in Sydney. And look who's all dressed up and ready for their first outing...
This thing is taking MAJOR organisation. I'm limited by luggage size for the trip (taxi/plane/carrying stuff) and a lack of storage space at the show. This has to be an EFFICIENT operation!! Spent all day on the display, and now have to manage the other aspects.... wish me luck.

Other desks can be found here. Thanks Kirsty!

Sewing Tutorial HEAVEN!!!

If you think I have some good tutorials, check out Sigrid's Sewing Tutorials Blog....

Sigrid is an amazing whizz with the sewing machine (see what she did with my Snap Bag pattern!!) and has links to tutorials from all over the internet.

I didn't want to do a post without a picture, so here's the sewing machine I've had since my 16th birthday. It's a simple little thing, but sturdy and reliable, and I'm ridiculously sentimental about it. My little assistant has claimed it as her own lately (hence dodgey sewing on the last tutorial... no time to adjust the new "settings").

When I moved to Ireland in 1998 I packed my industrial machine, my industrial overlocker and this machine in a crate with as much haberdashery and fabric as would fit. When I came home five years later I crated it all up again and shipped it home again.

Who says I'm obsessed?

Tuesday, August 19, 2008

Rainy Days and Mondays...

Well, I don't actually mind them that much.
This is the view from my studio window on Saturday. I love looking out at rain from my sewing cave. I feel all snug and comfy, somehow.... almost better than lying in bed listening to rain on the roof.

I love my studio. It's an old classroom on the third level of what used to be a High School Building, and has windows the full length of the room on both the North and South walls. I have LOADS OF NATURAL LIGHT and a clear view over the rooftops of Brunswick (ok, so it's not really picturesque... but I like the sense of space). I watch the city change colour (and sometimes disappear) with the changing weather. I even like looking out at cold, grey, Melbourne winter days.
This was supposed to be a temporary stop-gap studio about three and a half years ago.... Ooops! I forgot to MOVE OUT!! (Would YOU??)

How to sew with nice even seam allowances or topstitching

In my classes I find that a lot of people who are new to sewing lose sight of how wide their seam allowance ought to be. And even those with a bit more experience sometimes need a bit of guidance on how to keep parallel lines of topstitching (like on bag straps) nice and straight. Here's a simple trick to help out in either case.

Ahhhh, the old Post-It Note trick.... Well, you can use masking tape instead - but Post-It Notes stay straight when you stick them down, are a doddle to move around and don't leave sticky residue. A small Post-It Note pad also fits more neatly into a sewing kit than a roll of masking tape.

HERE'S HOW...
1. Mark the depth of your seam allowance (or row of topstitching) from the edge of your fabric, and line that mark up with your needle. I usually snip a small nick in the fabric to mark the seam allowance, but a chalk pencil mark (shows up nicely in photographs and) is an absolutely fine alternative if you prefer not to snip.

2. Lower the presser foot on the machine and stick the Post It note down on the machine bed against the edge of the fabric. This will remind you which seam guide to use... in fact it will BE your new seam guide. (While you're sewing, keep the edge of the fabric running along the edge of the Post-It Note). Your seam allowance will be SUPER STRAIGHT (and your machine will probably be sewing better than this machine was... insert long story here and move on, folks).

3. If you're sewing parallel lines, you can repeat the process again to sew the next row....

4. ...and the next row. You can keep moving that note out again and again until it... well, loses it's sticky. You then have the NEXT leaf in the notepad to use. Luckily there are lots of them.

Copyright Nicole Mallalieu 2008

Sunday, August 17, 2008

This is...how I like to spend the weekend

In my sewing cave - hermit-like and all alone. I DREAM about being able to do this, and hardly ever get the chance. I think I may have mentioned it before..... (I know, I'm a sewing bore).

I snatched a few hours here this weekend while the wee scratchy one went to be fed chocolate by her grandfather (that's the purpose of the visit as far as she's concerned). ABSOLUTE HEAVEN to be able to start AND FINISH (!!!!) things on the same day, uninterrupted. I made a little pair of trousers for the girl and finished off a few bag samples for the Sydney trip. Much-needed therapy after a pretty stressful, sleep-deprived week.

THANK YOU ALL FOR YOUR KIND WORDS OF SUPPORT on my last post. It really meant a lot. Our little red girl is finally fading to a pink blotchy version of herself, so hopefully normality will return and all (including her skin) will be peachy again. At least she no longer needs the anti-hystamines (which made her hyper instead of drowsy???!!) and we're all sleeping a bit better. I'm sure I'll cope with the car crisis, supplies problems and Sydney panic with more than two hours sleep behind me. This week will be a vast improvement on the last.... and I promise not to BLAAAAHHHH it all out like that again!

Thanks to The Bird Bath for this week's theme in Angela's lovely This Is meme. I'd like to have been able to do a post like Angela's... but that would be absolute fantasy.

Saturday, August 16, 2008

End of the week not-so-funnies....

Sick kid.

No sleep.

Sick kid with big allergic reaction to penicillin.

More no sleep.

Stupidly long waits to see doctors.

Hyperactive, scratchy, irritated/irritating kid.

Suppliers discontinuing supplies we need.

Suppliers not delivering supplies we ordered.

Trying to organise Sydney trip with hyperactive scratchy kid.

Insurance company "wrote off" my car

Web hosts threatening to pull the website off the air again.

Desperately trying to reduce image load on website.

No tutorials written.

No product development done.

No photos taken.

Tune in next week when we return to normal programming.... I hope.

Wednesday, August 13, 2008

On My Desk(s)

Again, the clutter spread throughout the studio. Bag and purse samples (in all stages of construction) from here to next week... next week being the big show.
More On My Desk desks here....

I'll let you in on a little secret....

I've been having a love affair for the last 21 years. When I was a fresh-faced and idealistic young fashion student at RMIT, I stumbled into something that would turn into a long, meaningful and very deep love..... I'm talking about the Nicholas Building in Melbourne.


Smack-bang in the heart of the city is this treasure-trove of artistic and creative folks, specialist suppliers and cute little galleries and shops. The virtually untouched architecture makes it feel like you could be in 1922...

Love it, love it, love it....

Now they're having OPEN STUDIOS....5-9pm on Thursday 28 and Friday 29 August

Well worth the effort if you can pop in for a peek at one of the real jewels in Melbourne's crown....

Tuesday, August 12, 2008

Tutorials

I know I promised lots of tutorials in August, and I haven't managed to do as many as I'd have liked. I'm so sorry - I've had a busy few weeks. Now a sick child has left me sleep deprived to the point where I think I'm going to start hallucinating if I don't have an early night tonight. No tutorial-writing for this little patternmaker....

Sooooo..... I'll link to a few others who can show you a thing or two - or at least point you in the direction of a few tutorials.

http://meikaslittletreasures.blogspot.com/2008/07/tutorials-galore.html

http://thirtyhandmadedays.blogspot.com/

http://www.taunton.com/threads/pages/nmt037.asp? (REALLY comprehensive list of sewing tips!!)

http://whipup.net/category/tutorials-patterns/ (Oooh - and I just found a new one of MINE on there!!!)

Sunday, August 10, 2008

How to insert the best magnetic snaps ever.

One of my PET HATES is a badly inserted magnetic catch (or snap). If you don't do these babies right they'll cut a hole clean through your fabric.

Anyone who has one of my patterns or who has been to one of my workshops would know that I certainly take the LONG WAY round on these, and that I bend the prongs INWARDS when I'm using fabric (outwards only on leather, thanks). There are lots of little tricks like that so you can ensure longevity in your lovely handmade bags, and it's worth the effort to get to know them.

One of the most overlooked areas is the BACK of the magnetic catch. The lumps, bumps and sharp edges of the metal clip can mark the outside of your bag (especially when you give it that final and all-important press!). That amazing cure-all Vilene S520 can protect you from disasters like that.

HOW TO SMOOTH THE BACK OF A MAGNETIC SNAP....

1. Insert a magnetic clip/catch/snap ... whatever you call them at your house.
2. Cut a piece of Vilene S520 to cover the back of the clip and about 1.5cm to 2cms all around it (or if the clip if it is close to the top of the bag or a seam, just cut a narrower strip that extends either side of the clip by about 2cm). 3. Use a bit of steam and press it (from both sides of fabric) to fuse it to the fabric surrounding the clip. (Yes! It's FUSIBLE!!)
4. Topstitch around the clip from the right side of fabric
Gosh - that was easy, wasn't it?

This is..a work in progress

How to sort out my display, what patterns and products to take with me (not to mention the finer points of transporting a whole lot of gear and a toddler across Sydney)....? It's all a bit of a work in progress at the moment - I've STARTED lots of aspects of the preparation, but haven't a clear end in sight - and only 12 days to go.... YIKES!

Oh, and there's those purse kits Lara, Bianca and I have been talking about .....hmmm... I think I'd better get my skates on if I'm to take those with me.

Fi was in a bit of a sewing frenzy a few weeks ago, and I was as cool as the proverbial cucumber. Not so cool now.... How are YOU doing, Fi?

For those who missed the news, there's a bunch of us (crafty types) who will be at the Stitches and Craft Show with the wonderful Living Creatively. Living Creatively will be on the third floor -THE WHOLE THIRD FLOOR!! If the Living Creatively spaces in Melbourne and Brisbane were anything to go by, the Sydney show will be a feast for the eyes and a buzz for the creative spirit! Angela and her team have STYLE with a capital S.

I'll be there from Friday afternoon to Sunday afternoon, and I'd LOVE it if you'd make yourself known to me - love to put a face to a name (I'm actually kind of freakishly good at remembering both, so don't be shy!!). I'm thrilled to hear that a few of my favourite regular customers are already planning to come along to see me.... it warms the cockles, you know?

I'd like to have at least half a clue about what to bring to the show(!!?), so Sydneysiders - YOUR FEEDBACK IS VERY WELCOME HERE!!!! We can SELL on the stands this time around, and can also have a sewing machine to demonstrate techniques, but I won't have much luggage space for lots of bag hardware, so I can't bring it all!!!

This Is is hosted by the lovely Angela. This week's theme is by Debbie. (And I'm sorry my post ended up sounding more like an advertisement... I'm a bit obsessed with this latest project. Talk about ANYTHING and I'll turn it into a Stitches and Craft conversation...!).

Saturday, August 9, 2008

Oops....

In all the excitement of the big givaway prize draw, I forgot to mention....The Teardrop Purse kit is on the website!

You can actually BUY it!!!

We also have the CHAINS for the antique brass frames. Unfortunately I'm still looking for BLACK purse chains to go with the frames that are in the kit. You can order extra antique brass frames and chains when you order your kit.

The pattern is for intermediate to advanced sewing skills (you need to be able to set in a curve really smoothly - a bit like a sleeve without ease or a princess line bodice). Beginners may need to start on something a little simpler before tackling this one.
Look out for beads with large threading holes (about 4-5mm) to use on rouleaux straps. I could only find brown when I went looking, so used a black permanent marker pen to match them to the black frame. It worked a treat!
I'm now working on one of these with PURSE FEET!!!

Friday, August 8, 2008

Another Bias Tape Tutorial

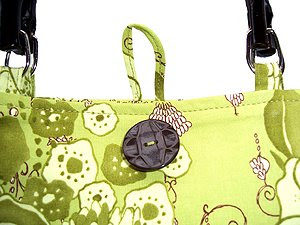
Honestly, I'll stop banging on about these bias tape gizmos eventually.... but I HAVE to let you know this trick. When you want to make a simple button closure for a bag (or garment) and you don't have matching cord or braid for the loop, do you go to the trouble of making rouleaux? I don't. I do THIS!!!........

HOW TO MAKE SUPER-QUICK BUTTON LOOPS....

1. Following the instructions in the 6mm "Clover" Bias Tape Maker packet (or this tutorial), make a length of tape - BUT YOU CAN CUT IT ON THE STRAIGHT GRAIN IF YOU WANT TO MAKE IT EASIER TO SEW!!!

2. Fold the tape in half lengthwise and press it again, keeping all the raw edges of fabric on the inside.
3. Stitch the two folded edges together (or zigzag over the full width of the folded fabric if you are uncertain of your ability to sew accurately on narrow things).4. Measure a loop to go around the button of your choice and add extra for the seam allowance at both ends. Trim away the excess.
5. Attach the loop (UPSIDE-DOWN, to the RIGHT SIDE of the top CENTRE-BACK edge of your bag) with a few stay-stitches.
6. Attach your facing/lining in the usual way, and sew a button at CENTRE-FRONT.Voila! Matching button loop in minutes... and no burned fingers!!
You can also use the larger sized bias tape makers for larger button loops. Below is the inside of the (WIP) Carry-All bag, and a larger loop is on the notebook computer compartment pocket.

PS. The finer points of making a button loop closure can be found in these pattern instructions....