Showing posts with label gadgets. Show all posts

Saturday, August 25, 2012

A week of love, loss, resurrection, reunion, reward, triumph and discovery... but not exactly on a Tolstoy-esque sort of scale.

We're talking MY LIFE here, not Anna Karenina.

Of course the love is all about a gadget..... My new Bernina "jeans foot", bought on a whim last week-and-oh-my-GAWD-I-love-it. 
 
Here it is, sailing smoothly over denim, felted jumper, leather and polypropylene webbing. I have NO IDEA how it does it, but it has some sort of built-in stump-jumping mechanism, that guides it over lumps and bumps and thick, thick fabric, far better than the walking foot can manage.

Loss.. well, the latest was $282 on a speeding fine that I had no idea I'd be getting.  Friends who know me were IMPRESSED when they heard that I don't always drive like the Nanna they've witnessed behind the wheel in my car. 

I just can't understand how I managed it.
There was also a loss of hair, which I didn't notice until I saw this photo three days after the haircut.  I told the hairdresser, "Do whatever you like". 
And this photo is an easy segue (as well as a reminder to re-stitch that side seam) as we move on to resurrection. 

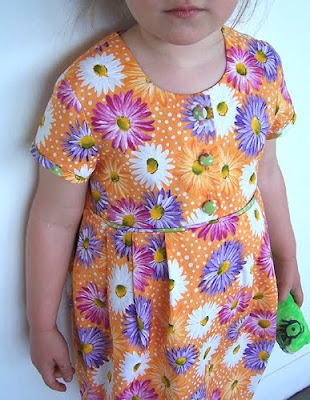
This dress began life as a 'little cowl-neck top' that I made on the knitting machine on my weekend break.  As soon as it was finished, it was obviously too big for me.  I tried wearing it one day but it all felt wrong.  It was too loose and floppy and swamped me.

On the verge of giving it to a taller, curvier sister, I made a last-ditched effort, moving a few seams and turning it into a little mini dress.... which grew and grew and grew as the day wore on, reminding me that there is much to learn about gauge and the properties of viscose yarn before I attempt another project in it.
(Apologies to the taller, curvier sister.  I quite like it now and you're not going to get it after all.)

Unable to wait for summer to wear my new knee-length (and growing) dress, I donned tights, boots and cardigan, and headed out to meet old and dear friends at the Shirt and Skirt Market at Abbotsford Convent last Sunday.
  
I went to see my good friends from Nina Wish Designs, who were stallholders for the day,  and took the opportunity to catch up with a bestie of 25+ years. 

It's a great thing, to spend time with old friends, in that easy space where so much is understood without words, and all is judged with love and respect.  The combination of shared history with genuine interest and care for each other in the here and now, gives all conversations a nurturing depth that is hard to define but wonderful to experience.

All around the market, I bumped into old and new friends, customers and students.  'Twas lovely to feel a part of a community.

Today, I was back in the saddle, teaching a Zippers for Bags class.
 
The couple of weeks break that I've had from teaching has certainly recharged my batteries (I had no idea how exhausted I was until I stopped) and I felt back to my old self today.

Teaching people new tricks and seeing them achieve what they didn't think they could do is the most rewarding part of my job.  Thanks for a great day, girls!


After class tonight, I finally worked out how people take photos with their computer web-cams for Skype profile photos and whatnot.  I know. It ain't rocket-science, but there you go... a discovery for me.    Here's the Eureka! moment, captured for posterity ...and then photoshopped to bring some contrast into the dimly-lit graininess of the image.
Apart from the fine line of (mystery) red blobs running through my forehead, nose and chin, I quite like the idea of low-fi image as an everyday look. It hides a multitude of best-overlooked fine details.

Lastly, TRIUMPH.    Those of you who have been to one of my classes (or tried to have any sort of conversation with me) over the last 6 months or so, will know just how obsessed I've been with 6mm Vliesofix tape: my favourite of all the fusible tapes.  I've been using it to hold hems and zips (and anything tricky) into place before I sew ...and endlessly waxing lyrical about it.

It's been like hens' teeth to get at retail level and it was getting pretty frustrating, sending people off to look for it in shops.  Last week I bought a whole box of the stuff at a bargained-down price (it's soon to be rebranded, so this current stock is soon to be "old stock") and I'm able to pass on the discount to customers - it's $7.50 per 15m roll, in the studio-shop only. 

If you live too far from us to come in and you don't see this product in your local store, ASK for it.  Unless the stores know that there is a demand for it, they may not know to buy it in (when it''s rebranded and more readily available).

And that's another week, done and dusted. 

Not an epic week.

Not even vaguely dramatic. 

But stuff happened and I thought I'd record a bit of it.

Hope your week was a good 'un.

Friday, October 22, 2010

The mouth of the beast

...isn't so scary when you know it's just the BIGGEST BIAS TAPE MAKER I'VE EVER SEEN!!!  

My personal shopper Ms Curlypops found this 5cm (2") number while she was looking for yarn for me.  I haven't had time to play with it yet, but I'm a bit excited at the prospect (sadly, I really am...really quite excited....).

Many thanks for all the yarn-shopping offers.  The yarn crisis has been averted!!  The Olearia may yet be finished!!!

Meanwhile, there are other beasties and demons to face down, patterns to write, books to re-write, life events to accept and a small girl to cuddle as much as I can. 

Wednesday, June 9, 2010

Same-same.... but different

It appears that our Duckbill Scissor suppliers are having ongoing issues with their supplier, so we've sourced some from elsewhere.

We now have Klasse Brand Duckbill scissors, which are ever-so-slightly bigger than our usuals, but do the same job. The good news is that there's a drop in price. These ones are $24.95 a pair.

Same-same.... slightly different. A slightly pointier "duckbill" blade, and the handles are slightly more bent over. They're also ever-so-slightly heavier.
EDITED TO ADD: Today I tested the new scissors on fine leather and coat-weight wool. They snipped straight through both layers (more easily than the lighter scissors). They're nice and sharp and STRONG.
To order them, just go through the usual Duckbill Scissor page on the website.

Thursday, March 18, 2010

Awl... or nothing at awl...

I've had that song in my head all evening.

Anyone who's been to a class with me in the last year or so would know what a HUGE fan I am of this little tool. It really is the BEST thing for holding down tricky bits of fabric (strap ends, binding etc) while you're working close to the sewing machine needle.


You may have seen it in various tutorials I've posted on this blog.... here, here and here. It's great for poking holes in things, too.

And my flat Australian tongue has problems differentiating between AWL and ALL....

Anyway - we now have them in the shop. For $2.40 you can have the sharp, pointy finger you always wanted. Or perhaps you didn't know that you needed one...? Believe me, you do.
For $2.40 you can't really go wrong. Throw one in the shopping basket with your next order and you, too, may be singing like Mr Sinatra.

PS. Have you ever noticed that we Aussies are a bit mixed up with our W's and R's ? We don't say them where they should be - AWL , CAR etc, but say them where they DON'T exist - DRAWRING, SAWRING, "vodkar and tonic". It was pointed out to me once and now I can't stop noticing it....

Wednesday, January 20, 2010

Impromptu button hole gauge... and a giveaway!

Visiting my parents on the weekend was looking a bit tricky because I had a lot of Tulip Dress sewing to do. Solution: do both. I can talk and sew, and drink tea and sew. No problem.

While two of my older sisters sat neatly with their embroidery, I spread out with sewing machine, a pile of dresses and bags of buttons and threads. (In other words, assumed the position of my 16-year-old self on the kitchen table). The one thing I forgot was a tape-measure.

..but placing buttonholes is not a problem when there are paper napkins around!


Who needs a button hole gauge...? (...well, actually, that's the next gadget on my list!).
The Tulip Dress is in its final stages. See my Flickr page for a few more pics. You might also start to see some pattern testing pics popping up on a few blogs. Here it is at Matching Pegs and two versions at Thornberry. It's also here at My Black Cardigan.

If you'd like to go into a draw to win a pattern for yourself, leave a comment here. I'll draw the prize when the pattern is ready to go up on the website. For a second chance at the pattern and a chance to win a yard/metre of fabric from my stash AS WELL, you can blog about it and leave another comment to tell me you've linked....


If you have any stories about improvised sewing gadgets, I'd love to hear them, too (not a rule of the giveaway.... just for fun!).


Which brings me to the monthly spend-over $50 prize. This month's prize will be ALSO be a copy of the Tulip Dress pattern - hot off the press! All invoices over $50 for the month of January will be going into the draw. So... a few chances to WIN WIN WIN!
EDITED TO ADD - Thank you - the draw is now closed!!

Tuesday, June 9, 2009

How to Transfer Pattern Markings

Every now and then someone askes a question that prompts me to write a quick tutorial. Techniques that are old news to more experienced sewers are sometimes new and valuable bits of sewing knowledge for others.

I was asked for tips on transferring pattern markings to the fabric. There are as many ways to transfer markings (tailors tacking, carbon paper, chalk etc) as there are types of pattern markings and symbols. Here are a couple of them that I use.

For dot markings, button or snap placements etc

On paper patterns I often stick a pin through a dot, lift the paper and...
Using a fabric marker pen or pencil, mark the point where the pin pierces the fabric.

I love my fade-away (air and water soluble) marker pen for its fine, highly visible dot.... that disappears when I'm finished with it! WOW!


More often, I punch a hole through the pattern (remember this gadget?) and draw the dot directly through the pattern, onto the fabric.


For T-notches and slit-notches
I use an Olfa Point Cutter. It rolls forward to make an accurate little snip. You can also use the points of your sharpest scissors (below).
The most important thing to remember with slit notches is to keep them tiny. You only need to snip about a 2-3mm. The notches are there to act as registration marks when you're at the sewing machine - to show where the seam allowances are or where one piece meets another.

You only need to see the snips (or nicks) when you're looking for them. Large snips can endanger the ends of your seams.

Tuesday, June 2, 2009

My new toy...

It can do a tri-fold in about 2 seconds and a single-fold pattern cover in about a second. I'm in love. Seriously.

From this day on, life will be easier. (Can you believe we've been doing this BY HAND for so long...????)

And yes - this gadget-girl has been sewing ....but there's a small problem with a lost battery charger for my camera (therefore no evidence of any craftiness).

(Note to self: Steal man-of-the-house's camera and get back to normal programming as soon as possible).

Sunday, May 17, 2009

So... what's under YOUR Rajah Cloth??

I've spoken of Rajah Cloths before....

Today I used one to press the RIGHT SIDE of a PVC strap (with the iron on a wool setting). It worked a treat! I was so impressed I took a photo. Tomorrow I'm going to try it on a COTTON setting....
Edited to add - Cotton and linen settings didn't melt the vinyl when the rajah cloth was put to the test today. Magic, I tell you....


Rajah cloths are a chemically treated cloth that somehow MAGICALLY take the sting out of a hot iron while still allowing the heat to do its work. Don't ask me how - just get one. You'll be amazed.

(Yes - we sell them. See details here).

Tuesday, January 13, 2009

Oh, How I love my Applique Mat...

Am I the only one who has fusible webbing that looks like this...?


If you're unfamiliar with fusible webbing and you want do any sort of textile work you should promptly introduce yourself!! It makes applique, fabric overlays and just about anything you want to hold firmly in place STAY PUT while you sew it.

It's like a huge sheet of hemming tape that you can cut to size. There are several brands on the market, and some are better at staying on their backing paper than others. The brand of the sample above is notorious for falling off the paper and tangling up. I don't think it should have been stored in a bag of interfacing scraps, somehow...

GADGET LOVE....
I love my applique mat because it allows me to use up every scrap of fusible webbing - with or without the backing paper. It helps the webbing to melt evenly over the back of the motif so that it will stick evenly to the base fabric. I can then stitch it into place without the slightest bit of movement. Lovely.


Here's how to use paper-less fusible webbing for fabulous applique!

1. Lay the webbing over the back of the fabric. (I've interfaced the fabric to stop the pattern on the base fabric from showing through). You can even use overlapped scraps of webbing to cover the fabric - nobody will ever know....
2. Lay the applique mat over the top of the fusible web and press with a hot iron.

3. Allow the fabric to cool and peel it from the mat. It will now be coated with a fusible plastic film on the underside.
4. Cut out your design - using a template, pattern or freehand cutting action (my personal fave!). You'll be surprised just how intricate a design you can create.

NOTE: For REPEAT MOTIFS you can cut templates in freezer paper and iron them to the front of the fabric while it is still attached to the mat (ie. before Step 3). When you remove the fabric from the mat, the freezer paper will be a stick-on template that you can cut around, peel off and re-use for your next applique piece.

5. With the plastic side down, iron the motif into place on your backing fabric. It will stick firmly into place.

6. You can use parts of a fabric print as applique motifs. Follow the above procedure to fuse a scrap of webbing to the wrong side of a fabric scrap....
7. Trim away the excess fabric to isolate the design you wish to applique...

8. ...and iron it into place. It will stick beautifully.

9. You can then stitch the pieces to the base fabric with a machine satin-stitch, blanket stitch or straight stitch, or you can (blow my mind with your patience and...) stitch it by hand!

I'll keep you posted on the finished applique. It's part of a WIP. The gorgeous print is from the City Blooms range by Benartex.

Monday, October 20, 2008

Transferring multi-size patterns to card

Following the interest in my post about using industrial patternmaking card, here's another tutorial to answer a question a few people have asked.... This is how to trace multi-sized commercial patterns to cardboard! 1. I really can't stand tissue paper patterns. I photocopy them (on my poor little overworked multi-function printer). I use the window as a lightbox to align the pattern pieces while I stick them together. You can skip this stage and simply use spray adhesive on the original tissue paper pattern to stick it to card (I used to do that in the days before multi-function printers!!).

***Edited to add - Check first that your photocopier doesn't alter the original size of the pattern (mine doesn't).

2. Using a glue-stick or spray adhesive, stick the paper pattern to some patterncard.

3. Cut out the card, following the outside line (no matter which size it is). This is your pattern template.

4. Trace around the cardboard template onto another piece of patterncard.

5. Use a tracing wheel to follow any necessary lines in the pattern that are not on the outside edge of the template. A good spiky patternmaker's wheel is the best thing for this, or you may be able to use carbon paper and a (slightly less-dangerous) dressmaker's wheel.

6. Lift up the template and trace over the line of dots that the tracing wheel has made on your new pattern piece. A patternmaking ruler is great for drawing smooth body-shaped curves (or long, straight lines).

7. Transfer all the pattern markings through to the new pattern piece. For grainlines or other straight line markings, draw a line straight over the template and onto the base cardboard. Lift the template and rule the line through on the pattern piece.

8. Mark any dot placement through to the new pattern with a small hole (use a pin or tailors awl). You can then punch these holes out on the new pattern, but the template won't be damaged.

9. Trim away the template so that the next size down is the outside edge.

10. Repeat the whole process for tracing off each new pattern size, until you reach the smallest size. You can use the original template as the smallest pattern piece.

11. Punch holes in the patterns so that you can hang them up.

12. You can use a proper pattern hook or just use a loop of string....
13. Ta-Dahhhhh! Lovely cardboard patterns that you can TRACE onto your fabric. No need for pins!!!